Live reloading
COMPATIBILITY NOTE
This guide targets express and assumes tsoa-next's current support policy: Node.js 22 or newer. We verify support on Node.js 22, 24, and 26 in CI. Examples below include npm, pnpm, and yarn variants where the command differs. We assume your setup is similar to the one recommended for getting started
Relevant API reference: @SpecPath, SpecPathOptions, SpecRequestContext, and SpecCacheHandler.
TIP
We will use nodemon and ts-node for live reloading, but any tool that allows us to hook into the reloading process will do. Alternatives may, i.e. be a combination of tsc -w and triggering tsoa spec-and-routes using onchange.
What we will talk about:
Reloading Code
Installing nodemon and ts-node
npm i -D nodemon ts-node concurrentlypnpm add -D nodemon ts-node concurrentlyyarn add -D nodemon ts-node concurrentlyCreating a nodemon config
Now, let's create a nodemon.json inside the root folder of our project that looks like this:
{
  "exec": "ts-node src/server.ts",
  "watch": ["src"],
  "ext": "ts"
}
Adding a dev script
Let's automatically start this setup with your package manager's dev script (npm run dev, pnpm dev, or yarn dev), and, while we're at it, add build and start commands in our package.json:
{
  "name": "starter",
  "version": "0.0.1",
+ "scripts": {
+   "dev": "concurrently \"nodemon\" \"nodemon -x tsoa spec-and-routes\"",
+   "build": "tsoa spec-and-routes && tsc",
+   "start": "node build/src/server.js"
+ },
  "dependencies": {
  // ...
}
Supercharging our developer experience with @SpecPath
@SpecPath(...) lets a controller expose a live spec or docs endpoint without reading swagger.json or openapi.yaml from disk at request time. That makes it a good fit for development workflows where you want the generated documentation to stay in sync with the same controller metadata your routes already use.
Installing a docs UI peer
Pick the docs UI target you want to use:
- Express:
npm i swagger-ui-express/pnpm add swagger-ui-express/yarn add swagger-ui-express - Koa:
npm i swagger-ui-koa/pnpm add swagger-ui-koa/yarn add swagger-ui-koa - Hapi:
npm i hapi-swagger/pnpm add hapi-swagger/yarn add hapi-swagger - Redoc:
npm i redoc/pnpm add redoc/yarn add redoc - RapiDoc:
npm i rapidoc/pnpm add rapidoc/yarn add rapidoc
Exposing a controller-scoped docs endpoint
Attach one or more @SpecPath(...) decorators to an existing controller:
import { Controller, Get, Route, SpecPath } from 'tsoa-next'

@Route('users')
@SpecPath()
@SpecPath('openapi.yaml', { target: 'yaml' })
@SpecPath('docs', { target: 'swagger' })
export class UsersController extends Controller {
  @Get()
  public list(): string[] {
    return []
  }
}
This gives you:
GET /users/specfor JSONGET /users/openapi.yamlfor YAMLGET /users/docsfor Swagger UI
Because the docs endpoint is generated from the same runtime metadata as your routes, it stays current as you edit controllers and re-run tsoa spec-and-routes.
Inspecting the Documentation
Now, when we navigate to localhost:3000/users/docs, we should see a current reflection of our API.
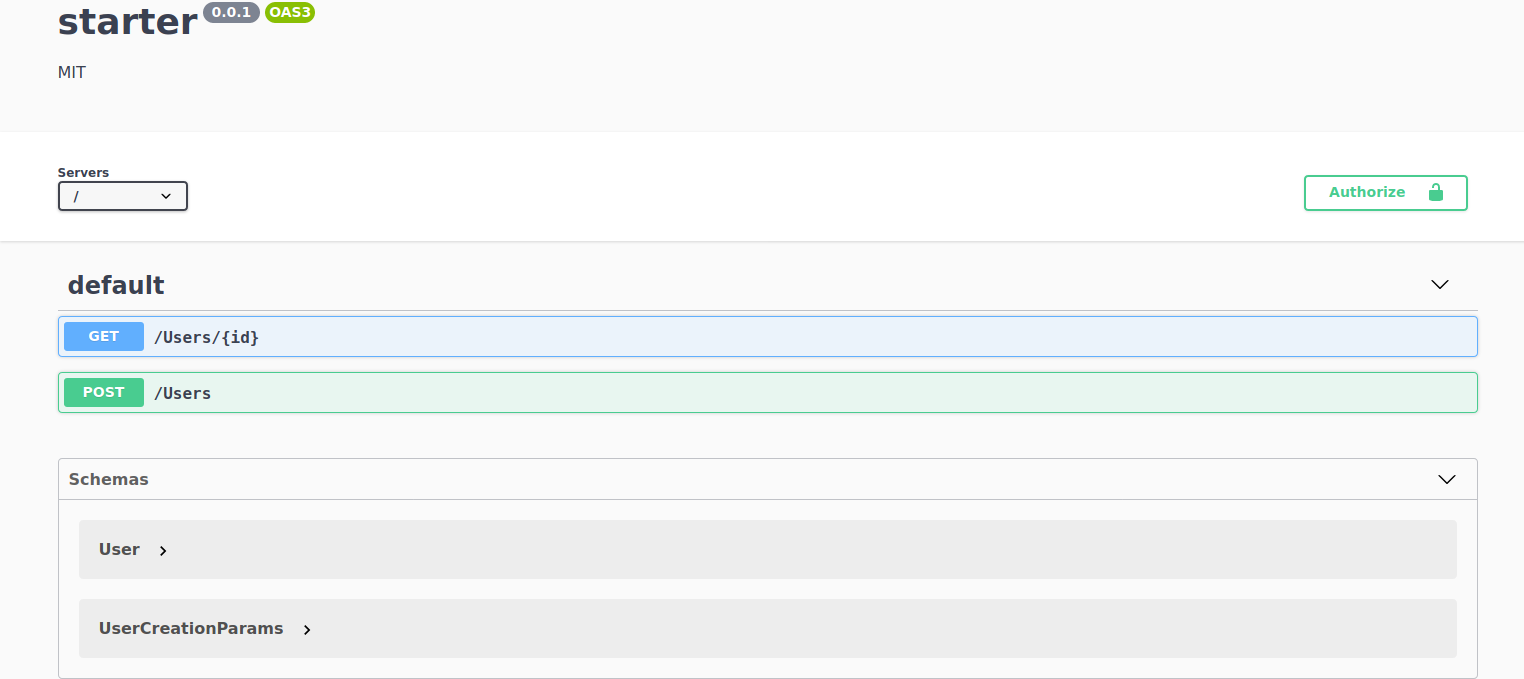
Sending requests through Swagger UI
We can select endpoints, click the "Try it out" button and submit some data by filling out the form. When we hit "Execute", that request will be sent to our server and the response will be displayed below the form.

Other built-in targets
If you prefer a different UI, change the target option:
@SpecPath('docs', { target: 'redoc' })@SpecPath('docs', { target: 'rapidoc' })
If you need a fully custom response, pass a handler in target instead. You can also add cache and gate in the same options object.
Contributors
 Vanna DiCatania
 Copilot